Many people use the best VPN services to protect themselves while they're using P2P services such as BitTorrent, but a perennial danger when doing so is that your VPN connection might go down, leaving your real-world details exposed for the world to see.
Some VPN providers, such as Private Internet Access, Mullvad, and VPNArea, (for the best VPN in 2018 check out our VPN reviews) include an internet kill switch in their VPN clients (VPNArea even includes a per-app kill switch), and we have discussed other third-party solutions to the problem before.
There is, however, another more direct way to - roll your own VPN kill switch (either global, or per-app) using a Firewall.
Using the built-in Windows Firewall
In Windows 7 it is quite easy to set up a kill switch using the built-in Firewall.
In Windows 8.x things are trickier because the Network and Sharing Center does not allow you to change Network type from Home to Public. We also could not get Windows 8.1 to display our OpenVPN connection in the Network and Sharing Center.
The first problem can be solved by following these instructions, and should work fine for PPTP and L2TP connections. We were unable to resolve the second, however, so we turned to Comodo Firewall.
The rest of this tutorial assumes that you are using OpenVPN (it shouldn't matter whether via a custom VPN client or the basic open source one).
Using Comodo Firewall
Comodo Firewall is a free stand-alone Firewall, that unlike the basic Windows one, which only monitors incoming connections, also monitors all outgoing connections (very useful for blocking viruses that have infected a computer from ‘dialing out’, and commercial software that likes to ‘call home’ from verifying its authenticity).
Comodo Firewall can be downloaded from here. For the process below to work, you will need to disable Windows Firewall once Comodo is installed.
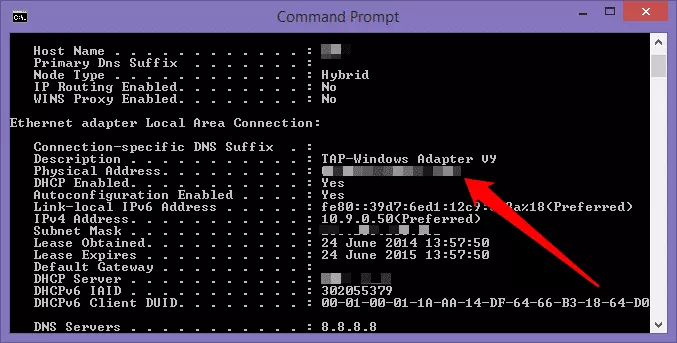
1. Establish your VPN’s physical address
With your OpenVPN connection up and running, Start -> type ‘CMD’. Type ipconfig /all at the command prompt and scroll through until you see the section labeled TAP-Win32 (or TAP-Windows Adapter). Note the Physical Address, and keep the window open for reference.
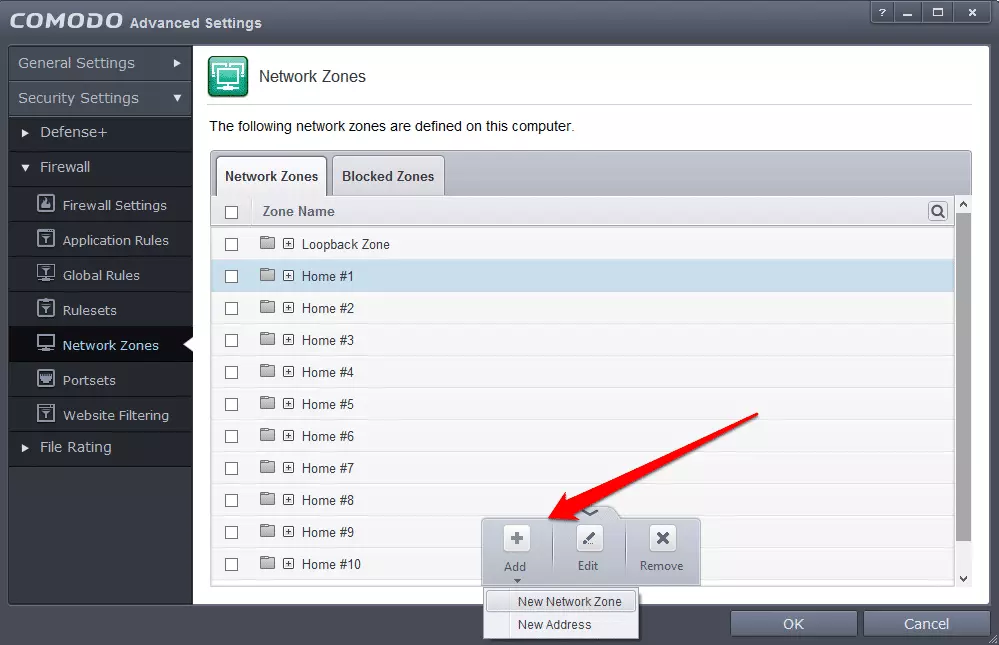
2. Create a new Network Zone.
a) Start Comodo Firewall and head for Advanced view (icon on the top left) -> Firewall -> Network Zones. Click on the little arrow at the bottom of the Comodo window and select Add -> New Network Zone
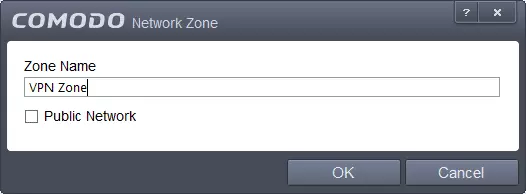
b) Give your new zone an appropriate name, and click OK.
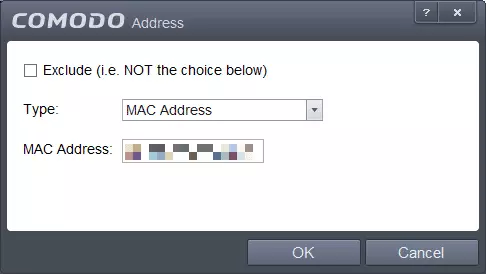
c) Select your new network created zone, Add -> New Address
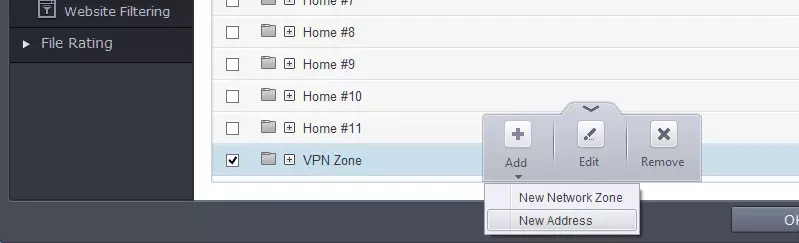
d) Select Type: Mac Address and enter the Physical Address you noted in Step 1. Click OK.
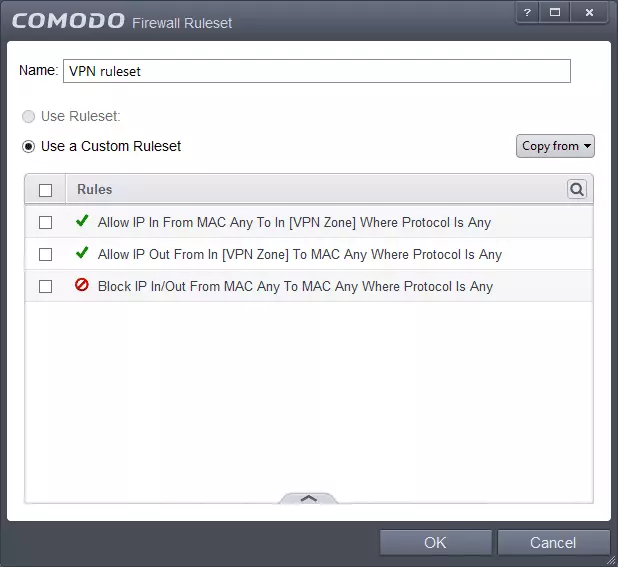
3. Make a Ruleset
a) Navigate in Comodo to Firewall -> Rulesets, and click ‘Add’.
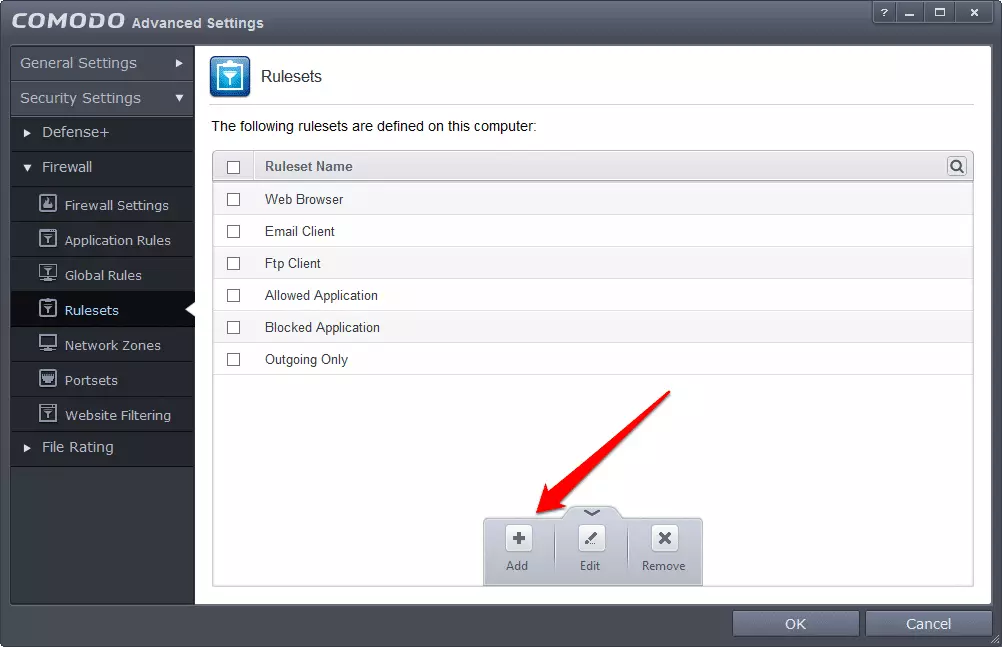
b)Name the new Ruleset, and click Add.
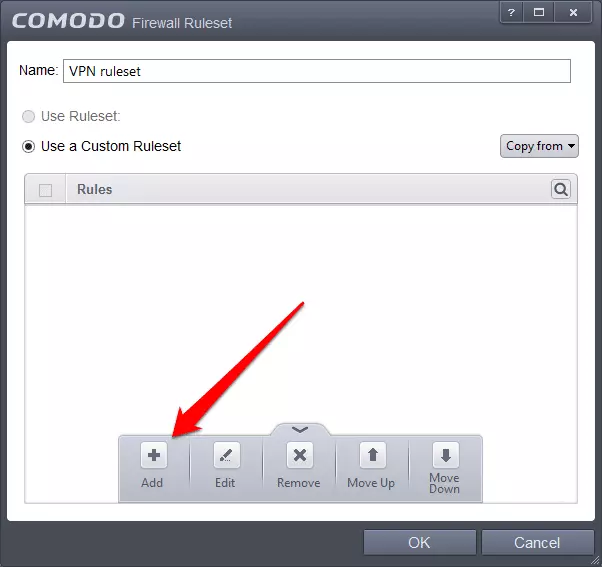
c)Select the following settings:
- Action: Block
- Protocol: IP
- Direction: In or Out
- Source Address: Any Address
- Destination Address: Any Address
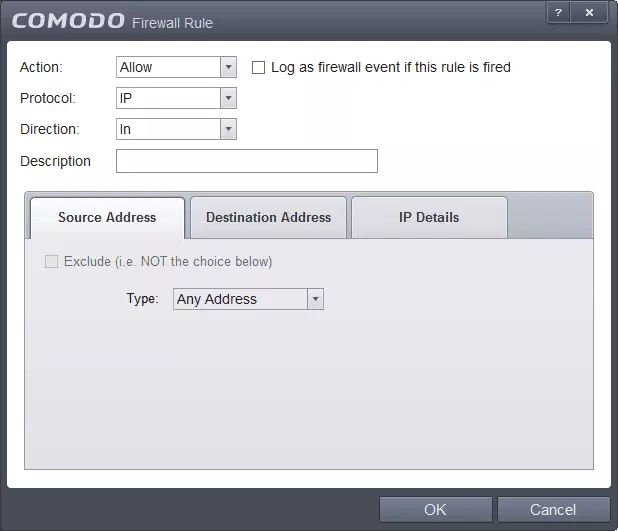
Click OK.
d) Create another two rules with the following settings:
- Action: Allow
- Protocol: IP
- Direction: Out
- Source Address: Network zone / your zone
- Destination Address: Any Address
e) Repeat again with the following settings:
- Action: Allow
- Protocol: IP
- Direction: In
- Source Address: Any Address
- Destination Address: Network Zone / your newly created network zone (in our example VPN Zone)
You should now see 3 lines in your Custom Ruleset - 2 green ones, followed by 1 red one (in the order shown below) - the order in which these rules appear is important, as it is the order in which they are applied. You can change the order by dragging the rules with your mouse, or by selecting a rule and using 'Move Up' or 'Move Down' from the menu (arrow at the bottom).
4. Apply rule to programs
a) Navigate to Firewall -> Application Rules, and either find the application you want to force to use VPN (if there is already a Firewall rule set for it), or ‘Add’ a new one (click the arrow at bottom of the window for fly-up menu).
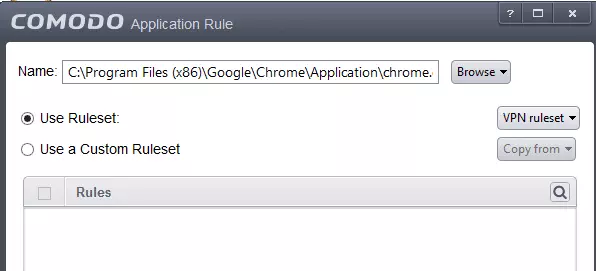
b) ‘Browse’ to location of the program to wish use (using any the File Groups or Running Processes filter)
c) Click the ‘Use Ruleset’ radio button and select your VPN Ruleset. Click ok. Here we have applied the Ruleset to Google Chrome, but it can also be applied to programs such uTorrent.
5. Test the application to make sure everything works.
We found a re-boot of the PC was required.
Global Kill Switch
You can instead keep things simple, and elect to set a ‘Global’ kill switch, which will cut off all your PC’s internet access when not connected to your VPN. To do this, navigate to Firewall -> Global Rules, and Add the same 3 rules we discussed in Step 3 ‘Make a Ruleset’. These may conflict with existing Firewall rules, some of which may have to be removed (a bit of trial and error may be needed here).
For more information about staying secure online, take a look at our best VPN for windows 10 guide.